DIY Lat Pulldown and Seated Row Machine

Lat pulldowns and seated rows are fantastic exercises for building back strength, but it’s hard to do these exercises at home without proper equipment.
But what if I told you that you can create your own DIY lat pulldown/seated row machine using your existing power rack? I did it using parts available on Amazon, and all I can say is that I should have done this a long time ago!
Before I get started, let’s quickly review the benefits of these exercises.
Lat pulldowns are a powerhouse exercise that can help you build a strong and powerful upper body by targeting the latissimus dorsi muscle in your back.
Seated rows, on the other hand, work multiple muscle groups in your upper and mid back, helping you develop a wide, V-shaped back that looks amazing from any angle.
Both exercises can improve your posture, reduce your risk of back pain, and help you build a strong and resilient spine.
DI-Why?
I didn’t originally set out to make my own lat pulldown / seated row machine. I’ve been extremely busy lately, so I started off by looking at solutions I could just buy outright.
I saw the Spud Inc Pulley System on Rogue’s website and I thought, “this is exactly what I need!”
But, they wanted over $200 plus tax and shipping for what struck me as a very simple setup.
That’s when I realized I could build it myself for less.

Rogue charges over $200 for this simple setup – DIY for less than half the cost
Materials
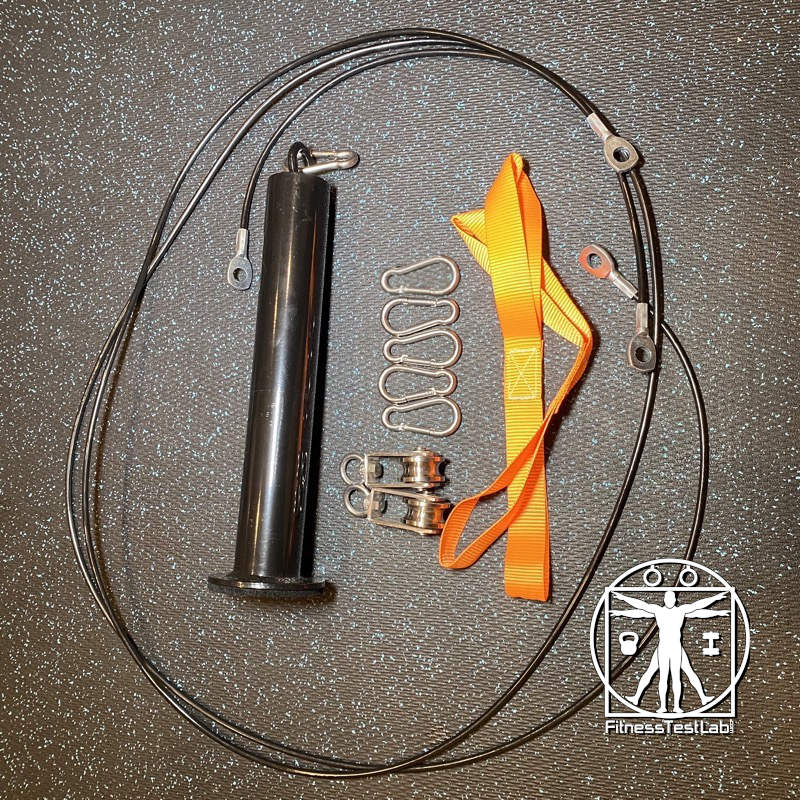
To build your own lat pulldown / seated row machine, you’ll need gapless pulleys, steel cables, straps, carabiners, a weight pin, and a bar attachment.
Here’s a list of what I bought off Amazon. All links should open in new tabs:
- Gapless pulleys
- 12 inch Soft Loop Tie Down Straps
- 6 Pack of 2 1/4 inch Snap Hook Carabiners
- Olympic weight loading pin
- Steel cable with loops
I bought two steel cables, one 67″ for pulldowns and one 78″ for rows.
I picked these lengths because I measured the height from the floor to my pull-up bar, and subtracted 13 inches for the weight pin and 2 inches for the strap and carabiner. That got me to 67″.
Then I measured the height from the pull-up bar to my lower rack cross bar and added 12 inches for leeway to row. That got me to 78″.
Your cable lengths may vary depending on the height of your rack, so make sure to measure before ordering.
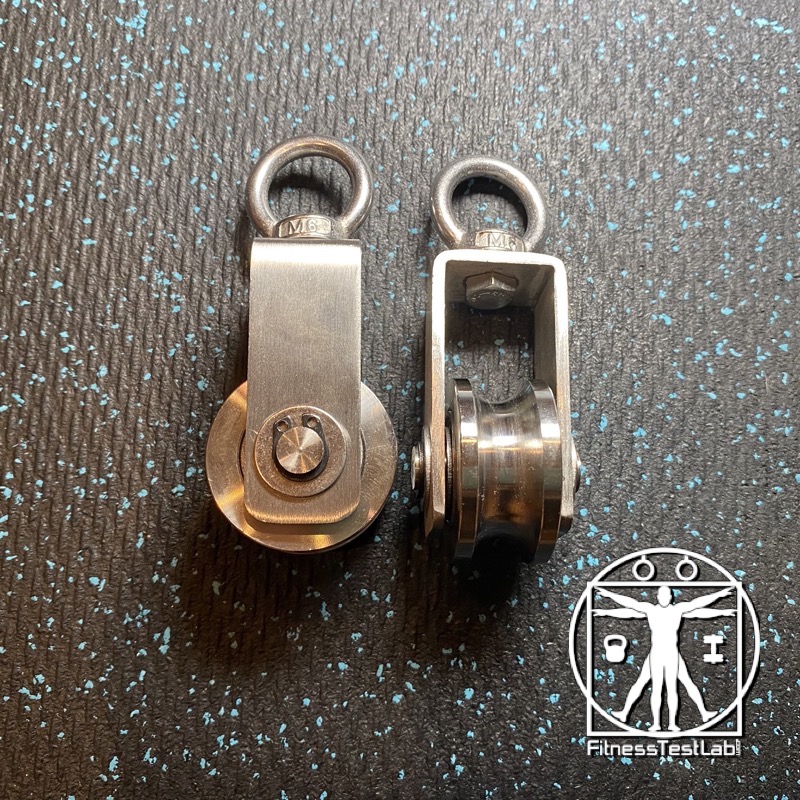
All the parts are important, but the type of pulleys matter a lot. You’ll want gapless pulleys that swivel, which prevents the cables from getting stuck in the pulleys and from jamming up as the weight moves.
The pulleys are one of the most expensive items in the build of materials, but they are a crucial component. If you get a pair of crappy pulleys then this whole setup will give you more grief than joy.
I paid fifteen bucks for the pair of pulleys I’m using and they are rock solid.
I did not need to buy a lat pulldown / rowing bar.
I already have two bars that work as pulldown and row bars, so I only needed to buy the other parts.
One is The Yoak (full review), which I keep finding new uses for, and the other is the Arch Nemesis Swiss Bar from Bells of Steel (full review).
If you’re in the market for a Swiss bar, the Arch Nemesis is a great versatile bar! Probably the best upper body development tool I own.
But I digress.
If you need a pulldown/row bar, there are lots of affordable options on Amazon.
Assembly
Once you’ve gathered your materials, it’s time to start assembling the machine. Here are the steps for lat pulldowns:
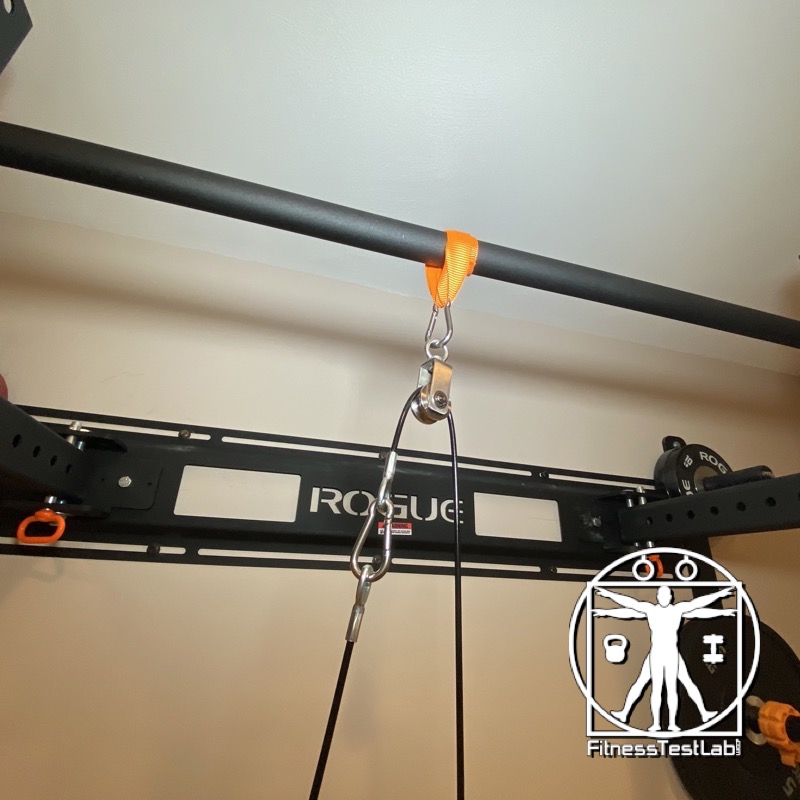
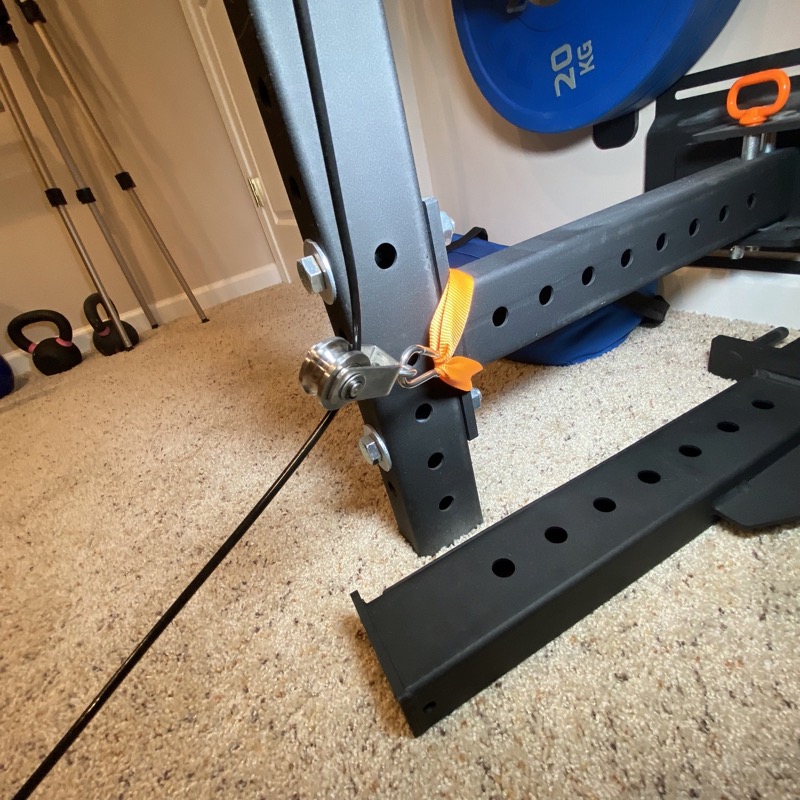
Wrap a strap around your pull up bar and attach a pulley using one of the carabiners.
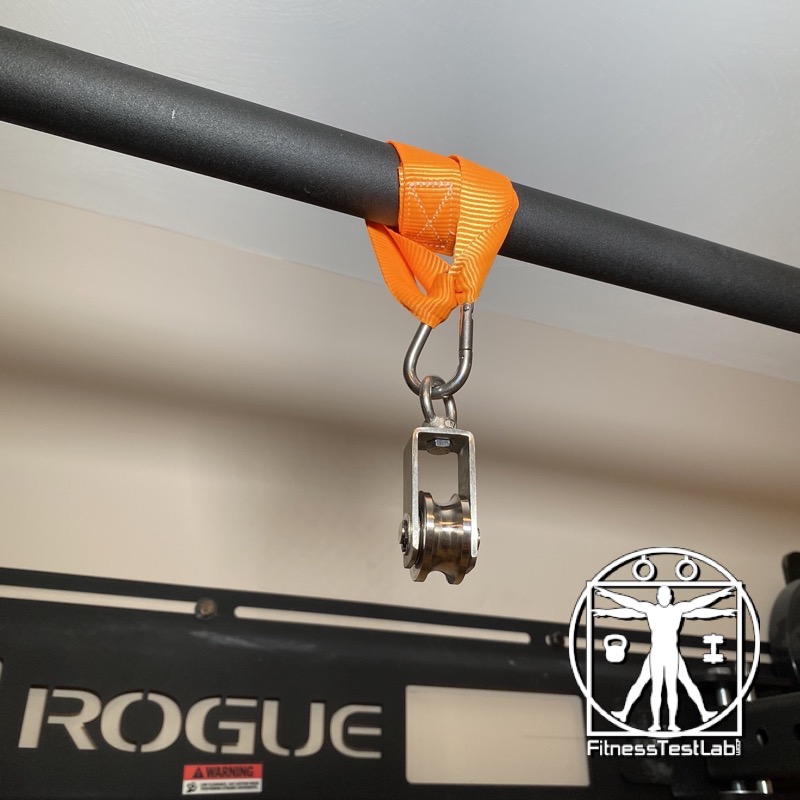
Thread the shorter steel cable through the pulley and attach a carabiner on each end of the cable.
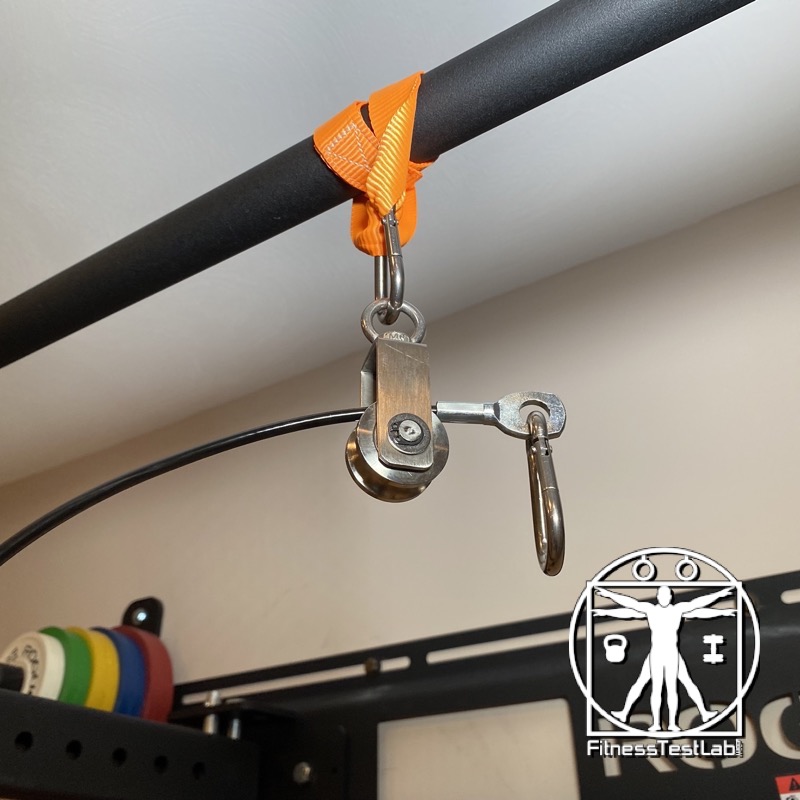
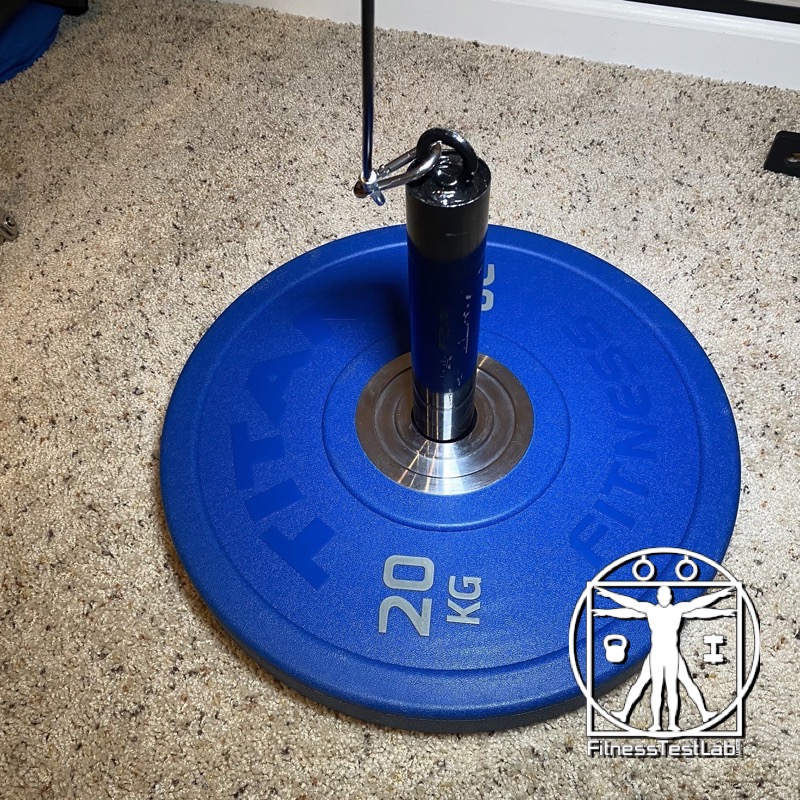
Add plates to the weight pin and attach one end of the cable to the weight pin using one of the carabiner on the cable.
Attach the pulldown bar to the cable using the other carabiner.
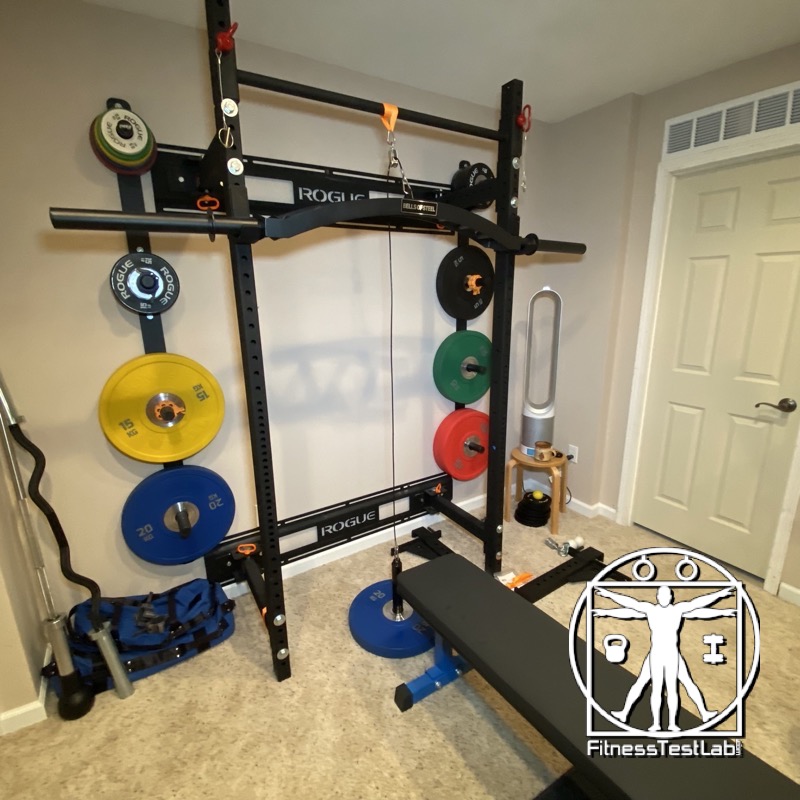
That’s it! Your DIY lat pulldown/seated row machine is now ready to use.
Move your bench close to the rack to sit on while pulling.
For seated rows, follow the same steps as for lat pulldowns, but don’t connect the pulldown bar.
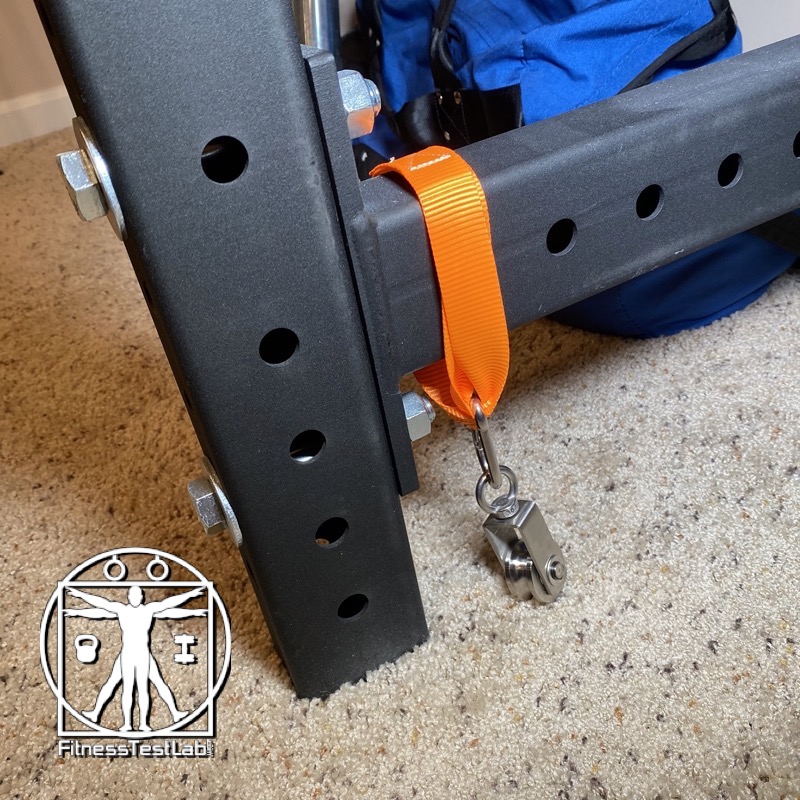
Instead, connect the second pulley to your lower rack cross bar using a strap and another carabiner.
Connect the second cable to the first cable using the carabiner on the first cable (instead of attaching the pulldown bar).
Thread the other end of the second cable through the lower pulley.
Attach your row bar and you’re ready to row!

Rowing with the Bells of Steel Arch Nemesis Swiss Bar
Conclusion
So there you have it – a complete DIY setup for lat pulldowns and seated rows in your home gym.
When first starting out, start with a light weight and gradually increase the resistance over time.
Not only for your muscles, but to ensure all the materials work properly under load.
Overall, a DIY lat pulldown/seated row machine can be a great addition to your existing power rack.
Not only does it save you money and space, but it also lets you enjoy the benefits of these exercises from the comfort of your own home.
Got any questions? Drop them in the comments!
Happy lifting!
About the Author Mario
I'm a software product manager with a full-time job, family, and a desire to stay strong, mobile, and fit. I separate fact from fiction to find the most effective and affordable options for home fitness. If you'd like to build your own home gym, start here.
Popular posts
Session expired
Please log in again. The login page will open in a new tab. After logging in you can close it and return to this page.