DIY Wobble Board for Faster Ankle Sprain Rehabilitation

Build Your Balance with a Balance Board You Build
I had the misfortune of rolling my ankle at the end of July 2016, so all experiments involving physical activity came to an abrupt halt for a time. I wish I could say I rolled it doing something cool, but I can’t. I was stepping off the edge of my garage (a height of about 1.5 inches) while carrying a large cumbersome box and my foot somehow landed wrong. Danger lurks everywhere! After an initial period of following the RICE protocol (rest, ice, compression, elevation), I spent the next two days alternating between application of ice and heat to help keep the swelling to a minimum. After that, the focus was on getting back on my feet as quickly as possible, both literally and figuratively. My research led me to a quirky tool called a wobble board, read on to learn how to build your own and how I used mine to help rehabilitate my sprained ankle.
Before I get rolling, I want to make clear that I’m not trying to pass myself off as a physical therapist because I most certainly am not. I’m only passing on information gathered while looking to improve my own circumstances in the hope that others might find benefit from it. Take what is useful to you and discard what is not.
If you’re not interested in the DIY aspect and only want to read about my experiment with ankle sprain rehab, skip ahead to the ‘Proprioception’ section using the table of contents below.
The easy way
In the time since I originally published this article, I’ve discovered inflatable wobble boards, also called balance discs.
I’ve used them for a few different types of rehab therapy and they work a lot better than the DIY wobble board I made.
So if you want to save time and just get to the rehab, pick up a couple of these inflatable wobble boards instead.
Parts
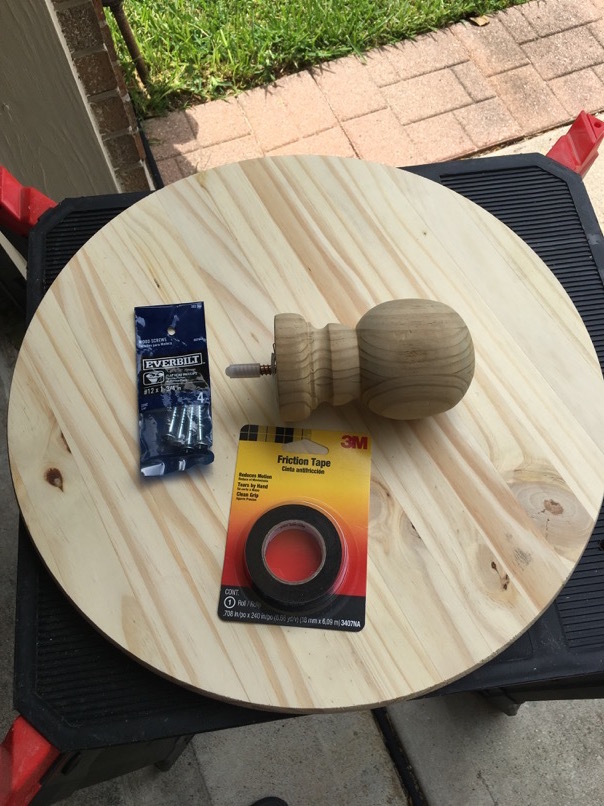
It doesn’t take very many parts to make a wobble board if you have easy access to a big box hardware store like I do. All I needed to buy was a flat wooden disk, a round wooden fence post topper, some screws, and some friction tape. These are the exact parts I bought from Home Depot and the prices I paid at the time of this writeup:
- 1” x 17.75” edge-glued wooden round – $6.48
- 4” x 4” pressure treated unfinished pine ball top – $3.17
- 3/4” x 20’ black friction tape – $2.97
- #12 x 1-3/4” phillips flat-head wood screws (4-pack) – $1.18
Total cost of parts before tax: $13.80
Tools
The pine ball top requires a clean level cut down the center of the ball in order to be usable. I own a miter saw (also called a chop saw), which makes these types of cuts a breeze. I’ll walk you through what I did with my saw, but if you don’t have one you’ll probably have to get creative. In addition to the miter saw, I used a cordless drill, drill bits, a phillips head bit, and a metal yardstick.
Assembly
The pine ball top is not very big, and I didn’t much care for the thought of holding it with one hand while attempting to cut it with a sharp rapidly rotating saw. Luckily I had some scrap lumber available to me from a previous project.
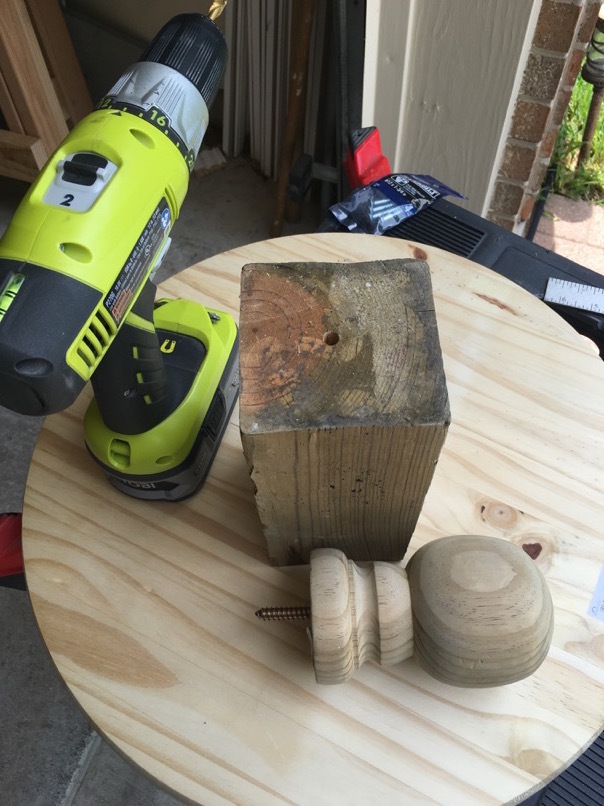
I drilled a hole in a piece of scrap 4”x4” wood and screwed the pine ball top into it. The 4×4 provided a base for me to hold while cutting the pine ball top without having to bring my hands close to the blade. Safety first! It also helped keep the ball level while I made the cut, which produced a clean level slice through the middle of the ball top.
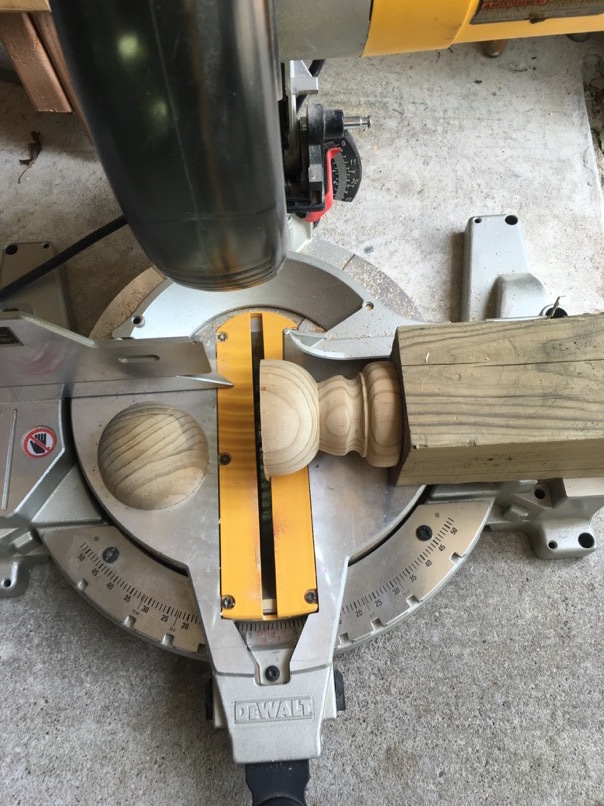
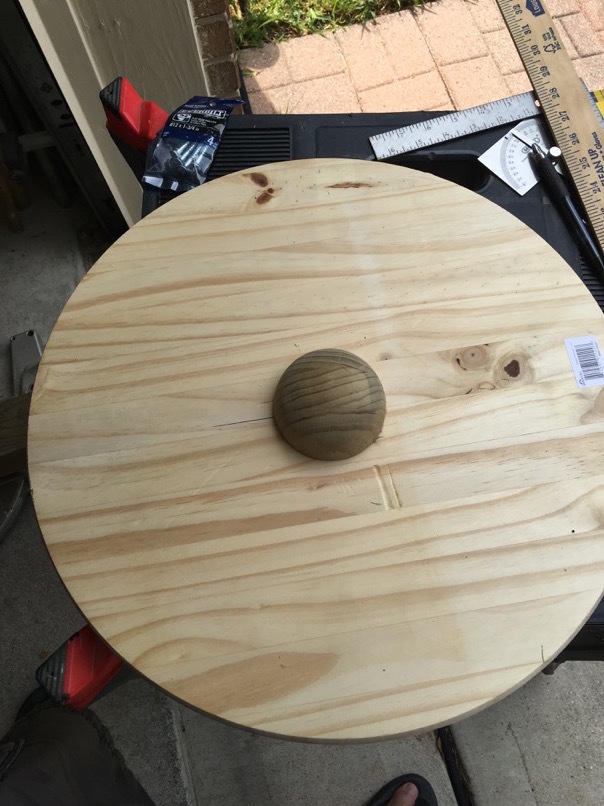
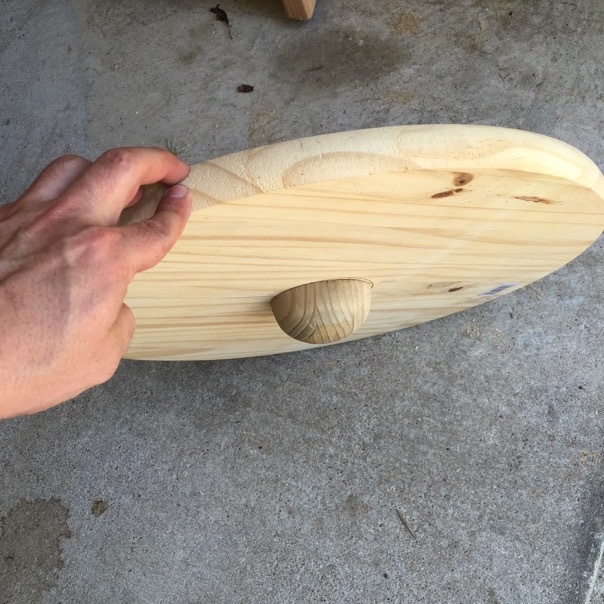
The freshly cut slice of the pine ball top will serve as the pivot point of the wobble board, the rest goes onto the scrap pile.
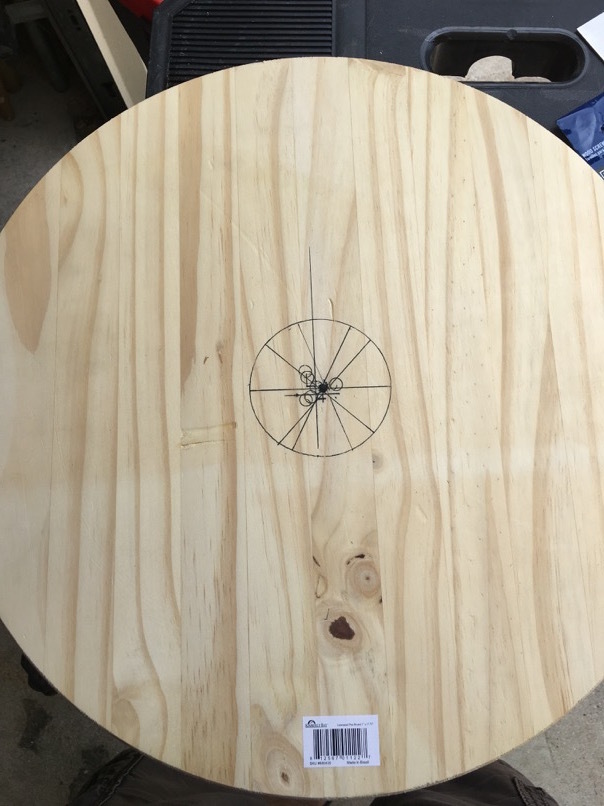
The next step was centering the pine ball slice on the wooden round. I thought this would be easy, but like many things in life it turned out to be more difficult than I thought it would be. I first tried using the yardstick to find the center of the wooden round by drawing lines through the middle of the board at several angles, thinking that the lines would converge on the center. Sounds logical, right? Wrong! I could not get the stupid lines to converge on a point, which you can see from the picture below.
After messing with this approach for fifteen minutes or so, I decided to go with a more brute force method. I placed the pine ball slice in what looked like the center and I used the yardstick to measure how far the edge of the pine ball slice was from the edge of the wooden round, all the way around the pine ball slice. I moved the pine ball slice as needed to even out distances between edges of the board on opposite sides of the slice. Once I was reasonably satisfied with the position of the pine ball slice, I used a pen to trace the circumference of the slice and drilled a hole in the middle of the circle I drew. It probably isn’t the exact dead center, but this isn’t rocket surgery, it’s a damn wobble board! Close enough.
UPDATE – A reader named Tariq offered this handy tip in the comments section for finding the center of a circle: https://www.instructables.com/How-to-find-the-center-of-a-circle/
Once I had the hole in the board, I put the pine slice back in the circle and flipped the wooden round over, being careful to keep the slice within the circle I traced. I used the newly drilled hole in the wooden round as a pilot to drill a starter hole into the pine ball slice, while using my other hand to try and keep the slice from moving. This worked, but it wasn’t ideal. If I had to do it again I’d use painters tape to secure the pine ball slice in place while drilling the starter hole.
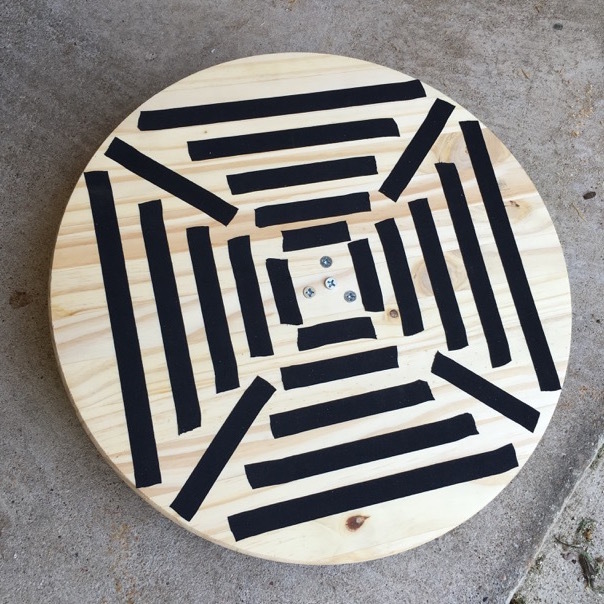
The starter hole in the pine ball slice is where the first screw was installed, and once this was done I drilled three more holes into the board and the slice for three more screws. I suppose one screw might have been enough, but since I had a four pack of screws I decided to use them all and guarantee the pine ball slice never comes off.

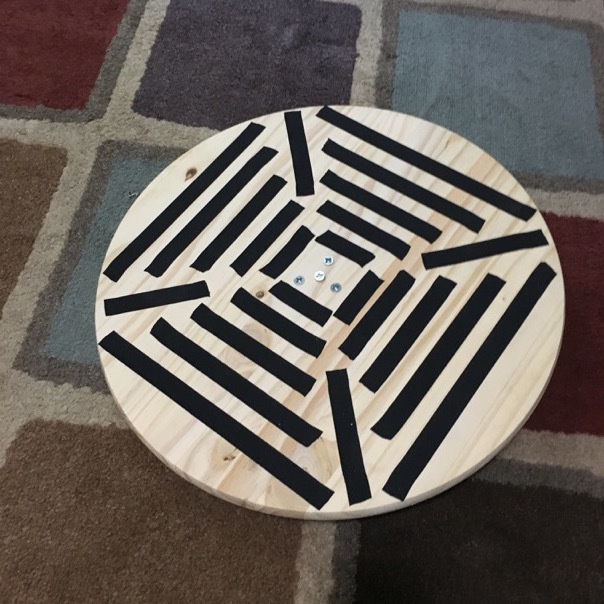
The last step was applying the friction tape. The tape isn’t strictly necessary, but I figured a little extra grip wouldn’t hurt. The pattern is completely arbitrary, I just wanted to cover as much of the board as possible so I could place my feet anywhere and still have grip.
Proprioception
Before I get into how I used the wobble board to help rehabilitate my sprained ankle, I’d like to lay some groundwork on proprioception.
Proprioception is a fancy word that essentially means the sense your body has of its position in space. Balance, posture, and the ability to touch the tip of your nose with your eyes closed are all aspects of proprioception. In general, proprioception is mostly handled unconsciously. This is good, because it would be exhausting to have to always pay conscious attention to the vast amount of muscular activity necessary to do everyday things like walk, stand, drive, etc. For most people, myself included, awareness of the body’s position in space only comes to the forefront of consciousness when the body sustains an injury.
Proprioception can be impaired when joints are injured, like when I sprained my ankle. Sprains in load-bearing joints like the ankle are especially problematic because they have a two-fold impact – in addition to the lost mobility of the damaged joint, the rest of the body has to adopt a new movement pattern to accommodate the compromised joint. Without proper healing and correction through rest and rehabilitation, the compromised movement pattern can be etched into the nervous system as the new normal way of moving. Not cool.
As an engineer, I find the prospect of a finely tuned system operating at a suboptimal level to be unacceptable. It would be like allowing my car to run with one cylinder offline all the time. Being the impatient and tech-focused guy I am, I looked into ways to rehabilitate my ankle faster and came across numerous references from physical therapists on the benefits of a wobble board as a rehabilitation tool.
Being the frugal and tool-savvy guy I am, I decided to build my own out of parts sourced from Home Depot rather than buy one. I figured I’d get some mileage out of the sprain with a fun DIY project as well as fodder for a new blog post. As the saying goes, never let a crisis go to waste.
Rehabilitation
I’ve learned that a very common symptom of compromised proprioception is poor balance. Pain in a load bearing joint can easily crowd out the unconscious processing of proprioceptive signals from the body, resulting in reduced coordination, which leads to reduced balance. I can attest to this, I was unable to apply full weight to my right ankle for a few days and my equilibrium was totally shot. I was focusing so much on trying to keep my ankle from hurting that I ran into a few walls while turning corners in my house as I hobbled around.
Performing balance exercises on a wobble board can help retrain the brain to control the position of the injured joint and move that control from a conscious level back to the unconscious level where it belongs. This is backed up by science – numerous studies demonstrate the benefit of wobble board training for long-term recovery from ankle sprains and reduction of sport-related ankle injuries.
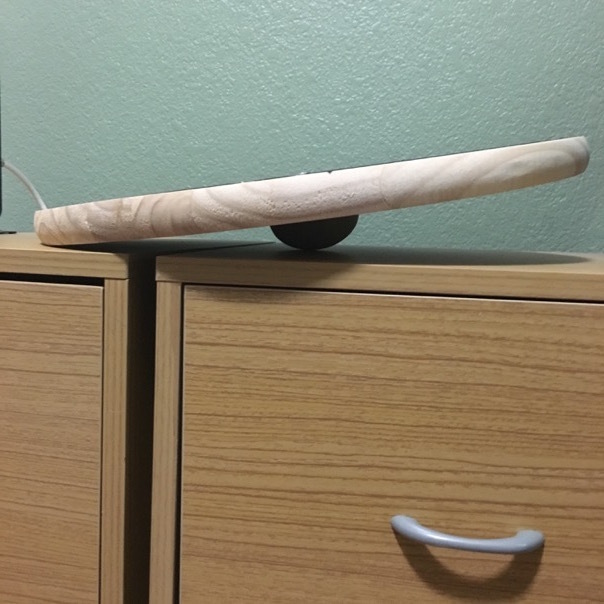
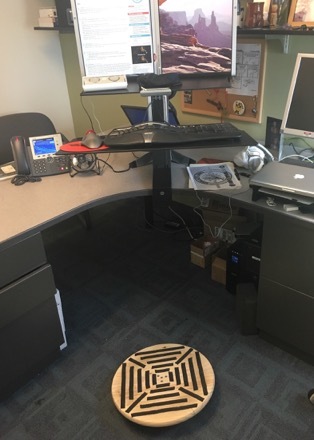
Once I had my wobble board built, I took it to work to use in front of my standing desk. I went through the following sequence of exercises, as many times as I could every day.
With feet flat on the board:
- Till the board forward till the front edge touches the floor. Balance on the edge for a few seconds. Tilt the board backward till the back edge touches the floor. Balance on the edge for a few seconds. Repeat.
- Till the board left till the left edge touches the floor. Balance on the edge for a few seconds. Tilt the board right till the right edge touches the floor. Balance on the edge for a few seconds. Repeat.
- Tilt the board forward till the front edge touches the floor. Shift body weight counterclockwise around the board to rotate the edge touching the floor all the way round the board. Repeat as many times as possible, then change direction and repeat.
- Attempt to balance weight evenly so no edge of the board is touching the floor. Stay balanced as long as possible.
- Repeat all steps, with eyes closed.
The first couple of days were the most difficult because of the pain in my ankle and because my balance was way off. I had a hard time getting through the exercises and didn’t even attempt to go through them with my eyes closed. I kept at it though and over the next few days it got easier to move my ankle. By the middle of the following week I was able to walk more or less normally again on even ground without pain. Walking pain-free on uneven ground took another two weeks.
To be clear, the wobble board did not necessarily help with healing my ankle. Healing is a process that takes a set amount of time and I don’t really think the wobble board sped anything up in that regard. However, the wobble board did help with rehabilitation – the process of learning to trust my ankle again and apply normal weight and movement to it. In this regard I did find the wobble board to be a tremendous help and I definitely recommend it as a rehabilitation tool.
Beyond Rehab
I now keep the board at work and I use it on a daily basis with my standing desk. I’ve found that my balance has improved as a result, I’m able to stand on the board without needing support and without touching any board edges to the floor for as long as ten seconds. Ten seconds isn’t going to win me any balance awards, but when I first started I couldn’t balance on the board at all without an edge touching the floor. Daily use of the wobble board is clearly improving my overall coordination.
When I first started using the board, I couldn’t stand on it with my eyes closed. I was amazed at how much I rely on visual cues to balance because once I closed my eyes it was nearly impossible for me to balance on the board. I kept falling off as soon as I tried to balance in any way, even just trying to keep any edge consistently touching the floor in the same spot. I’ve kept at it though and I’ve found that I’ve greatly improved in this regard as well.
There are other uses for wobble boards I haven’t event explored yet. A wobble board is basically an unstable platform, which can be incorporated into other exercises like yoga (as one example) to increase the difficulty. If I do end up exploring other uses I’ll write about them in a future post.
The Bottom Line
A wobble board is a great tool for rehabilitation of a sprained ankle and for prevention of future ankle injury. It’s also beneficial for enhancing overall balance and coordination. I’m using mine on a regular basis and I’m still finding benefits months after my ankle has healed. I’m actually glad I sprained my ankle, because if I hadn’t I likely never would have thought to try a wobble board. I only wish I had found this amazing tool sooner!
If you don’t have the time, inclination, or tools to build your own wobble board, no worries. I’ve scoured the options on Amazon to pick out a few that are well reviewed and listed at reasonable prices. I’ve specifically chosen boards that are at least 15” wide and have fully round bases. The wider platform offers more flexibility in feet placement and the round bottom ensures you get the most bang for your buck.
Here are the best three options I could find:
- Isokinetics Inc. Brand 16.5″ Deluxe Balance Board – A plastic board that offers two difficulty levels in case you don’t want to jump right into a completely round bottom like I did.
- j/fit 16″ Round Fixed Angle Balance Board – A simple wooden board with a round wooden ball bottom. This design was the inspiration to build my own.
- Fitter First 16″ Pro Wobble Board – A wooden board with an adjustable bottom that can be set to three difficulty levels by adjusting the board’s angle of tilt. The most expensive option, but also the most versatile.
FYI – there is a glut of wooden boards on Amazon made by the same manufacturer but branded differently, selling for anywhere from $25-40. I don’t recommend these boards because of the flatter plastic bottoms – they will be easier to balance on but won’t provide the same benefit as a board with a fully rounded bottom.
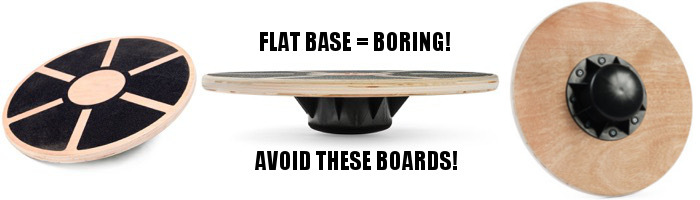
This is not the board you’re looking for
If you’ve ever used a wobble board or are considering using one, I’d like to hear from you. What’s your experience with these things?
About the Author Mario
I'm a software product manager with a full-time job, family, and a desire to stay strong, mobile, and fit. I separate fact from fiction to find the most effective and affordable options for home fitness. If you'd like to build your own home gym, start here.
Popular posts
Session expired
Please log in again. The login page will open in a new tab. After logging in you can close it and return to this page.
The ball can be purposely set off center. If you look at the professional BAPS (biomechanical ankle platform system) that physical therapists use which cost $600-$1000, it is off center on purpose. There are also places to put small weights on top. I am trying to make my own BAPS board and could not find a good quality cheap wood disc until I saw your site. I was initially was going to use a wood/plastic cutting board, but could not find one of the right size for cheap. I am buying a CanDo balance board for the half ball pieces with 1/4″ screw then I will get the disk you used to make my own. I will drill holes and use a tap and die so I can move the half ball around. I will use bolts as posts to hold the weights in place. CanDo does make a BAPS board for about $200, but this is much cheaper. Thanks!
You’re welcome, I’m glad you found the article helpful. Let me know how that goes for you, a DIY BAPS sounds interesting!
I’m sure everyone who got here knows how to use google to find answers…but it might be worth including a link (or your own version of the instructions) on how to find the center of a circle. I’ll be building your wobble board today and will be using the quick trick for centering the ball from here:
https://www.instructables.com/How-to-find-the-center-of-a-circle/
Thanks for the post!! 😉
This is a great tip, I’ll add it to the writeup. Thanks for sharing and good luck with your wobble board build!